Car Candy
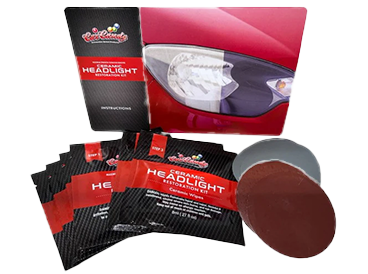
CERAMIC HEADLIGHT RESTORATION KIT **NEW**
Quantity:
Pickup available at Lakeland, FL
Usually ready in 24 hours
CERAMIC HEADLIGHT RESTORATION KIT **NEW**
Lakeland, FL
Pickup available, usually ready in 24 hours
4860 Drane Field Road
Lakeland FL 33811
United States
Choose options
Quantity:
For best results, Car Candy Ceramic Headlight restoration should be applied in the shade. A spray bottle with water or a hose and several clean dry towels are needed.
STEP 1:
- Before starting and if applicable, open the hood for easier access to the headlights.
- Wash headlights thoroughly with Bubblicious Concentrated Vehicle Wash, and rinse well.
- Using an Oxidation Remover Wipe, rub each headlight in a circular, scrubbing motion on all areas of the lens. During this process any oxidation in the lens will be extracted, and the wipe may turn yellow. Move to the next Oxidation Remover Wipe when the current wipe becomes yellow and soiled. Use all of the wipes to ensure your headlights are as clean as possible. Don’t worry if your wipes are still yellow as the next step will remove any remaining oxidation.
- Rinse thoroughly.
- Note: When Step 1 is complete, your headlights should have a cloudy look. If Oxidation Remover gets on your paint, wipe it off immediately with a clean dry towel. Complete both headlights with all of the Step 1 wipes before proceeding to Step 2.
STEP 2:
- Wet the headlight lens and Surface Prep Disc with water (a squirt bottle works well) and scrub the entire lens in a uniform, non-circular motion for approximately 2 to 3 minutes. Be sure to keep the lens wet during this time! Upon completion, rinse well with water.
- Rinse the headlights and surrounding areas well with water and dry with a clean soft towel.
- Use multiple towels to ensure the headlights are dry. They must be completely dry before starting Step 3.
- Note: When Step 2 is complete, your headlights should have a clouded, frosted appearance. More surface prep is needed if areas are clear or shiny.
STEP 3:
- Put on another set of gloves and open one of the Car Candy Ceramic Clear Coat Wipes. Moving horizontally from top to bottom, carefully wipe the coating in a single direction using a 50% overlapping technique. Apply only a single coat. Repeat this process with the second wipe on the other headlight.
- Allow the Car Candy Ceramic Clear Coating to dry for a minimum of 60 minutes before driving or exposing to any moisture.
- Note: If the Clear Coat gets on paint, don’t worry Just wipe it off immediately with a clean and dry towel.
